
MREF Project Manager Guide
Overview
In MREF, the Project Manager creates projects inside a funded Program and manages them from draft through closeout. This covers the project record, scope, schedule, funding, budget, procurement, contacts, activation and closeout.
It is step 3 of the overall setup, after the Program Manager has issued a Funding Source and a Program.
Logging in
MREF can be reached from any device with internet access. To log in as a Project Manager, enter the following URL into your browser: [placeholder]
Sign in with your Project Manager credentials. For the dev environment, the test account is sproject. After signing in, you will be taken to the home page, where the Project Manager Links are available.
Creating a Project
A new project starts as a Draft. Applying a template fills in its predefined setup so you don't build it by hand.
Add a new Project
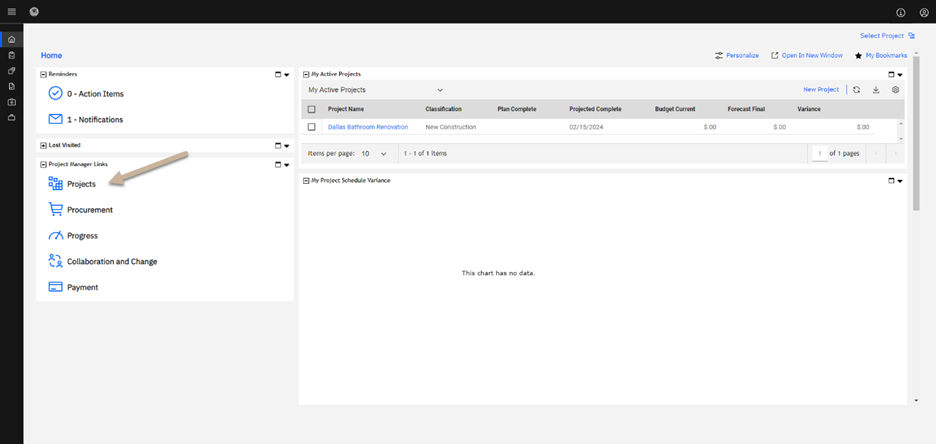
Under Project Manager Links on the home page, click Projects to open the Projects dashboard.
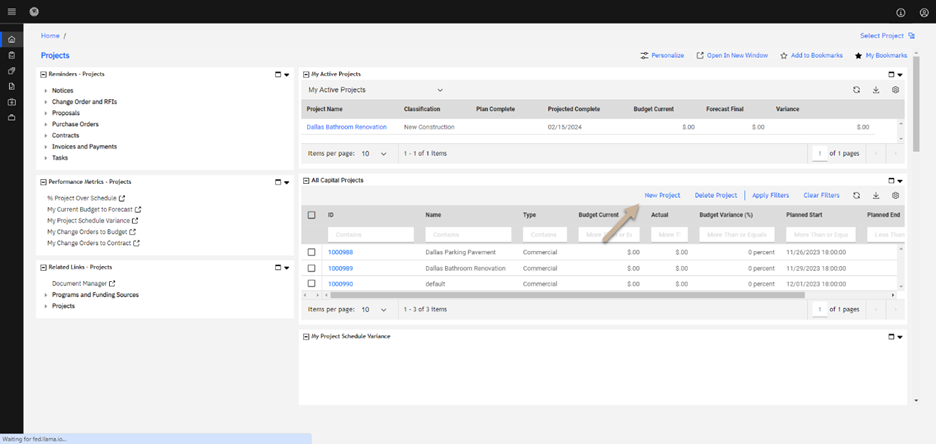
Click New Project to begin creating a new project.
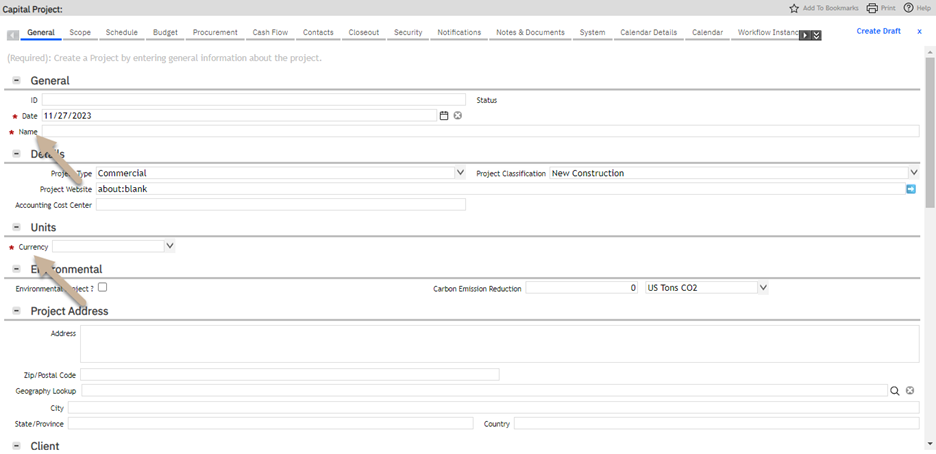
Fill in the Name and Currency fields if they are not already filled in.
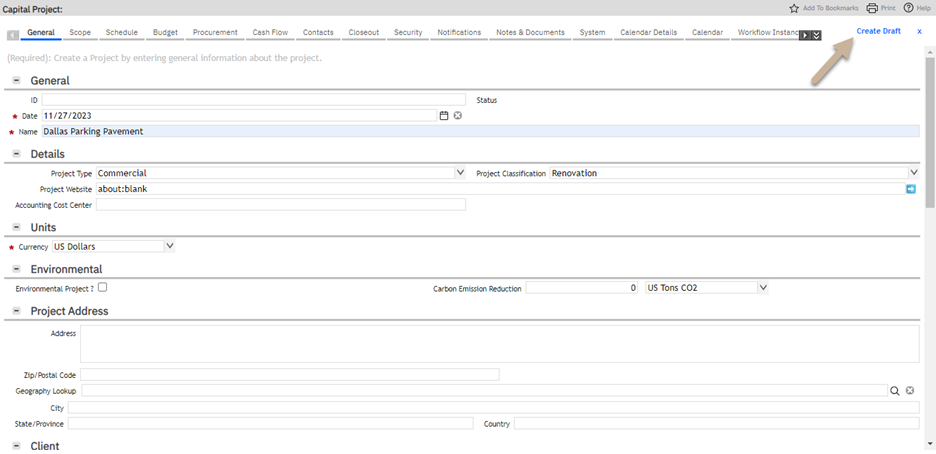
Click Create Draft. The project is now in Draft status.
Apply a template
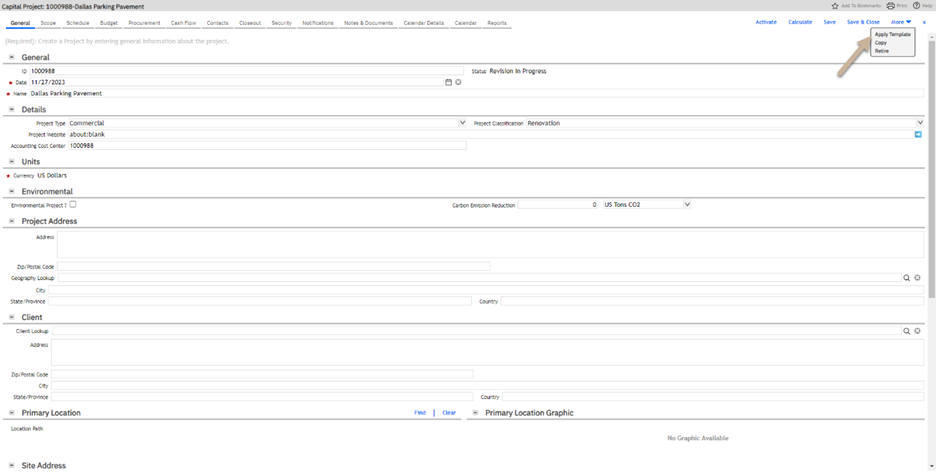
To apply a predefined template, click More, then Apply Template.
Select Commercial Project and click Continue.
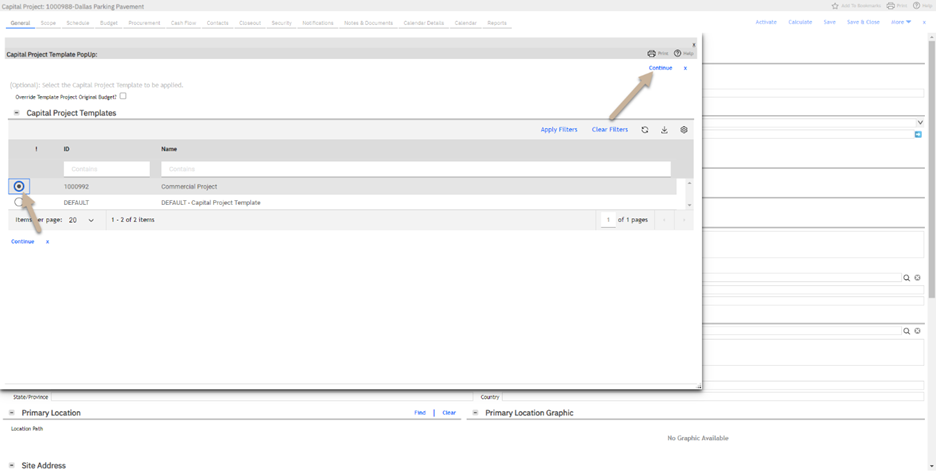
Click Save on the project record to apply the changes. The template applies its preset configuration to the project.
Managing Scope and Schedule
Scope
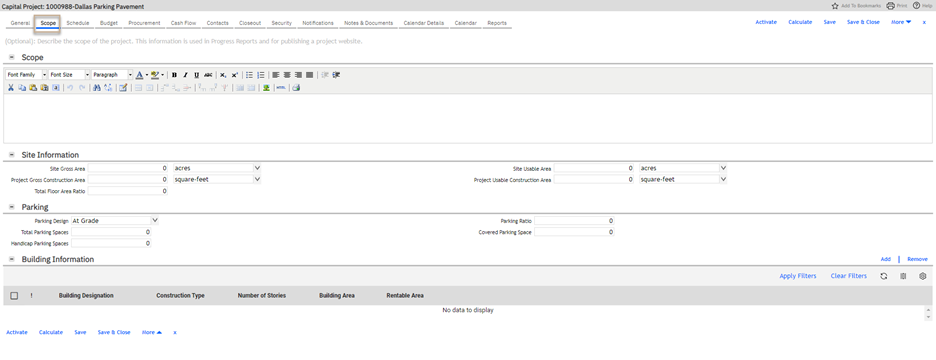
Use the Scope tab to record the project's scope, site information, parking and building information.
Schedule
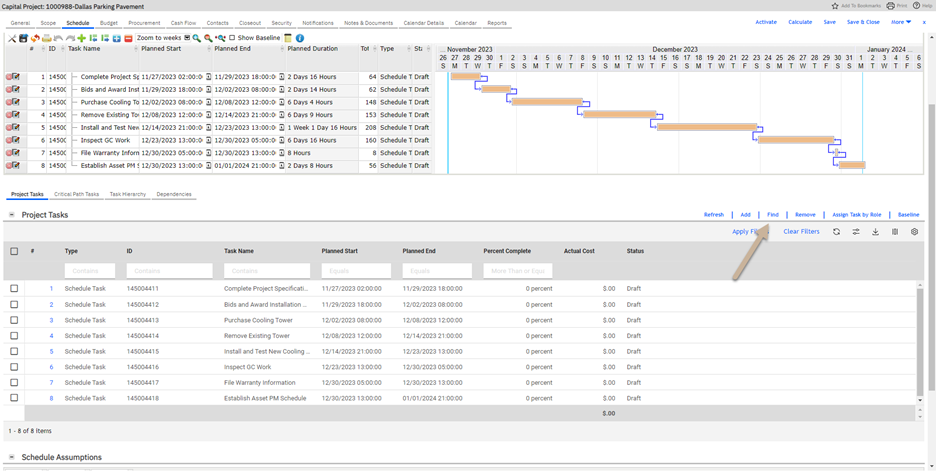
Go to the Schedule tab. The template has already added the key tasks for the project. To add a task, click Find if it already exists, or Add to create a new one.
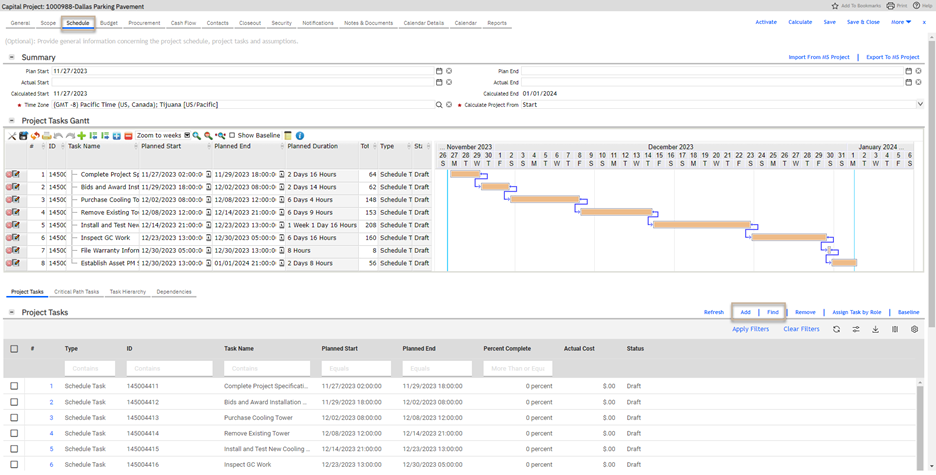
Click Find to add other tasks to the project.
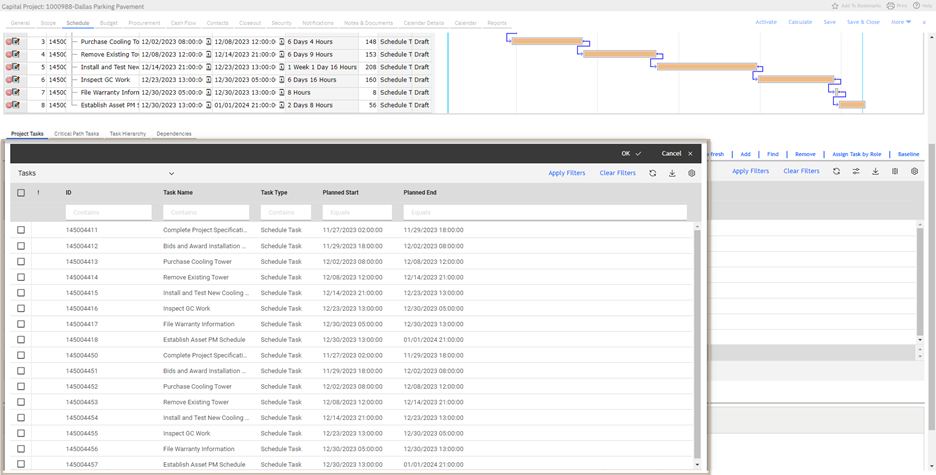
The task list shows all available tasks. Select one or more and click OK; they are added to the project's task list.
Allocating Funds
Funding sources are added to a project to track its spending against initiatives, and to track overall spending across projects, funding sources and fiscal years.
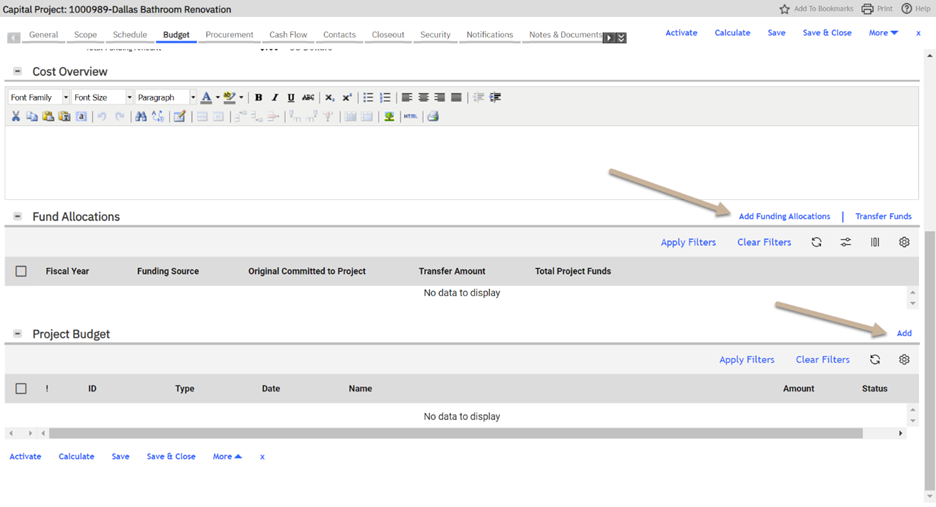
The Budget tab holds all of the project's financial information. To add funding, click Add Funding Allocation.
Select your funding source for the allocation and click OK.
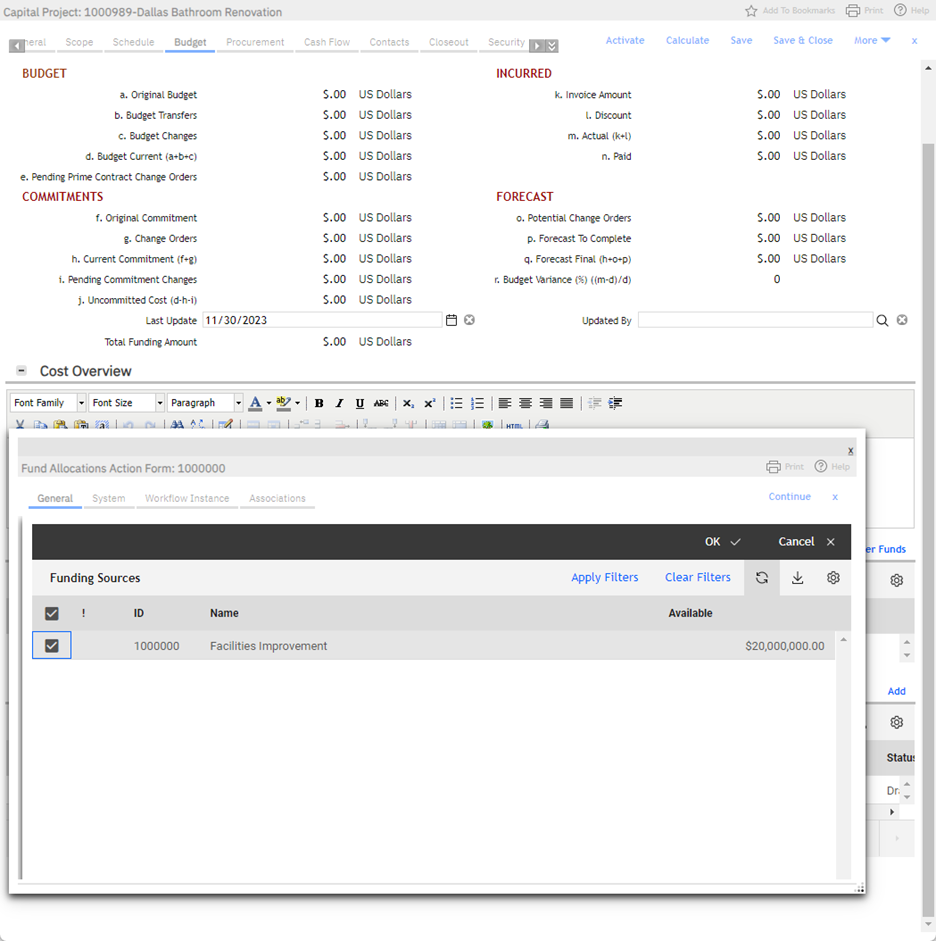
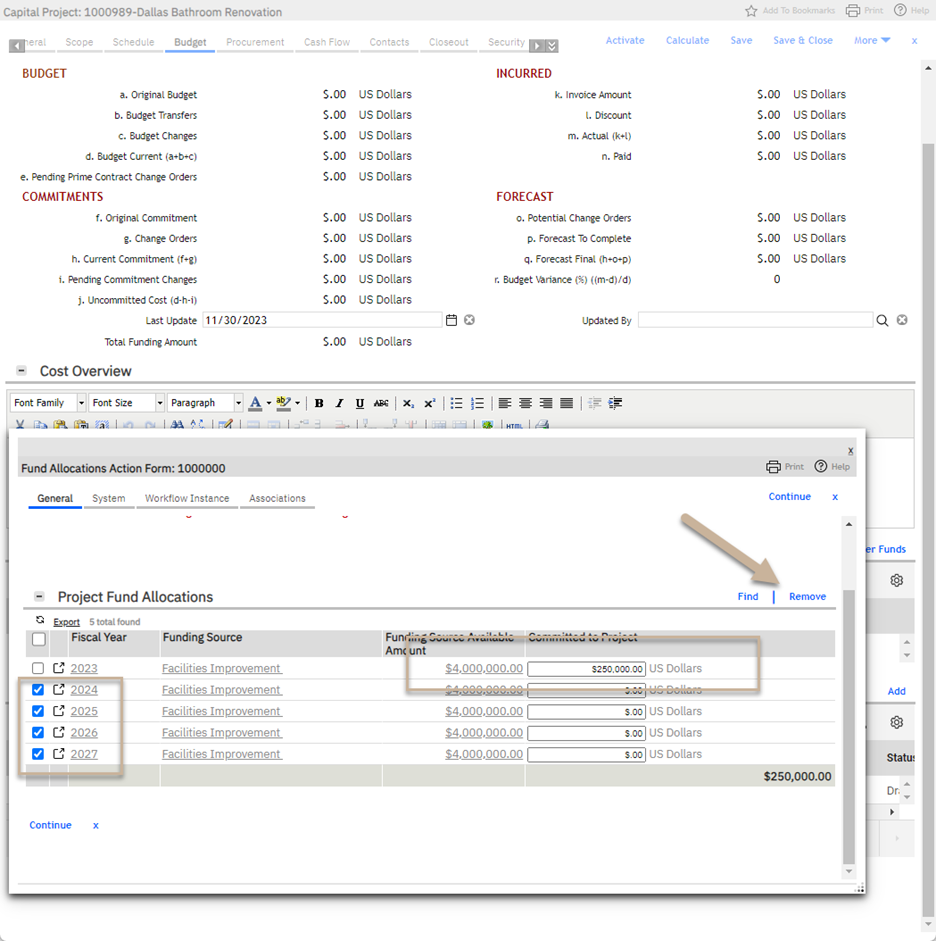
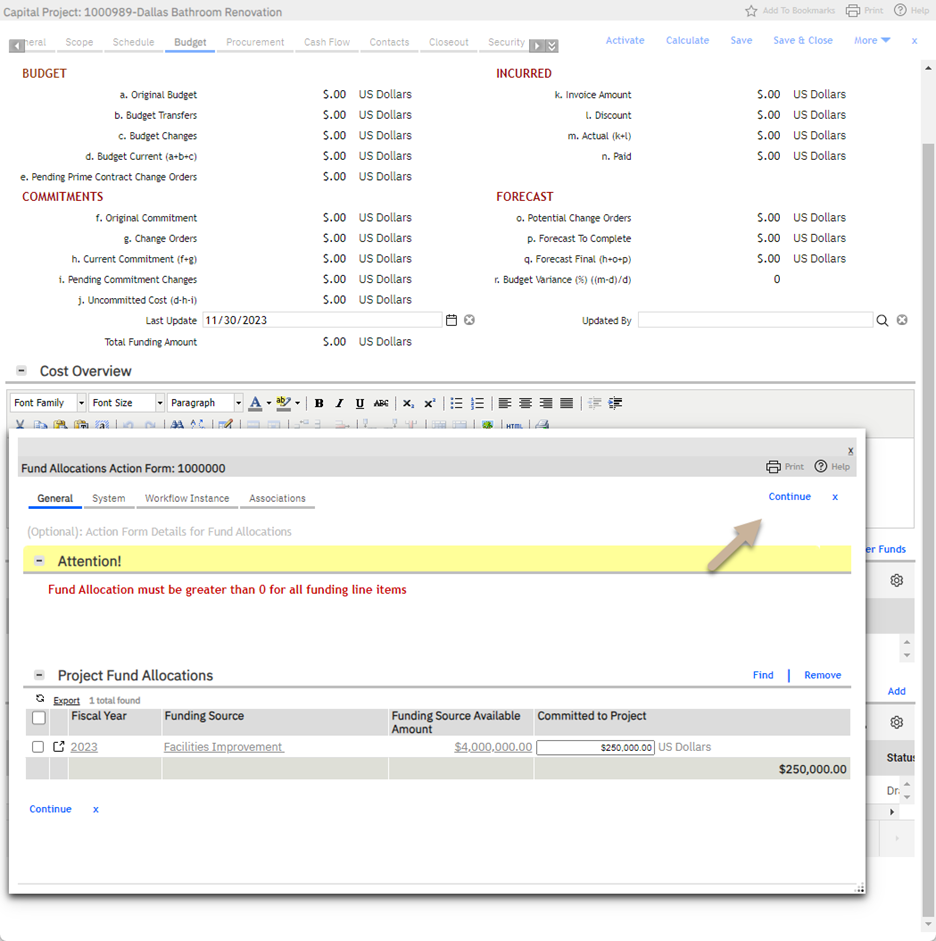
The allocation years appear, and you can commit an amount from the funding source for each year. Remove any fund allocation years the project isn't using; otherwise the system will show an error.
Click Continue to add the funding source to the project.
Adding a Budget
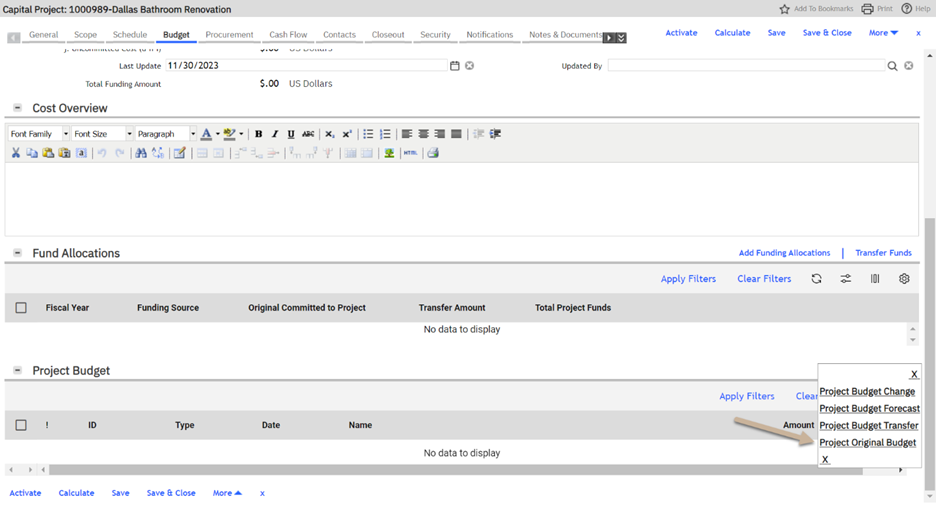
In the Project Budget section, click Add and select Project Original Budget. The system also handles budget changes, forecasts and transfers. Budgets can also be set up from templates, so cost codes stay the same across projects.
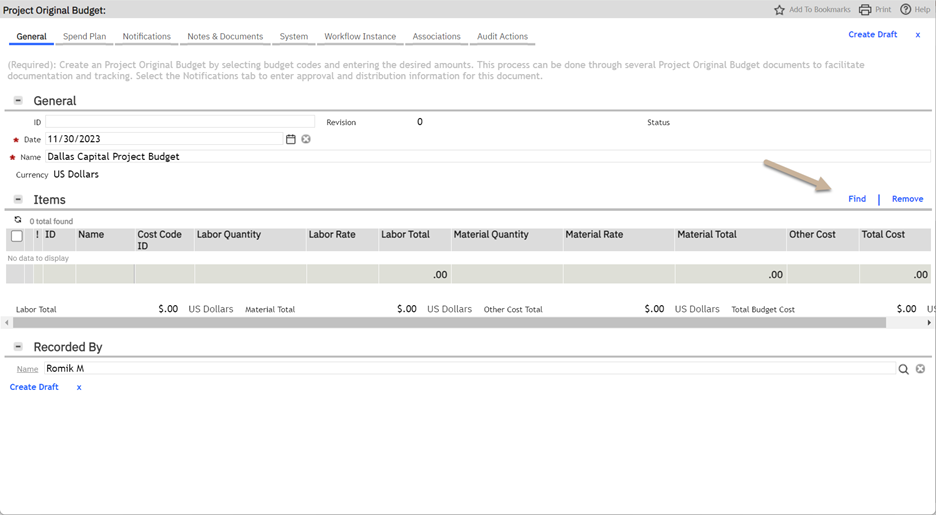
On the Project Budget, click Find and select the items to add.
Managing Procurement
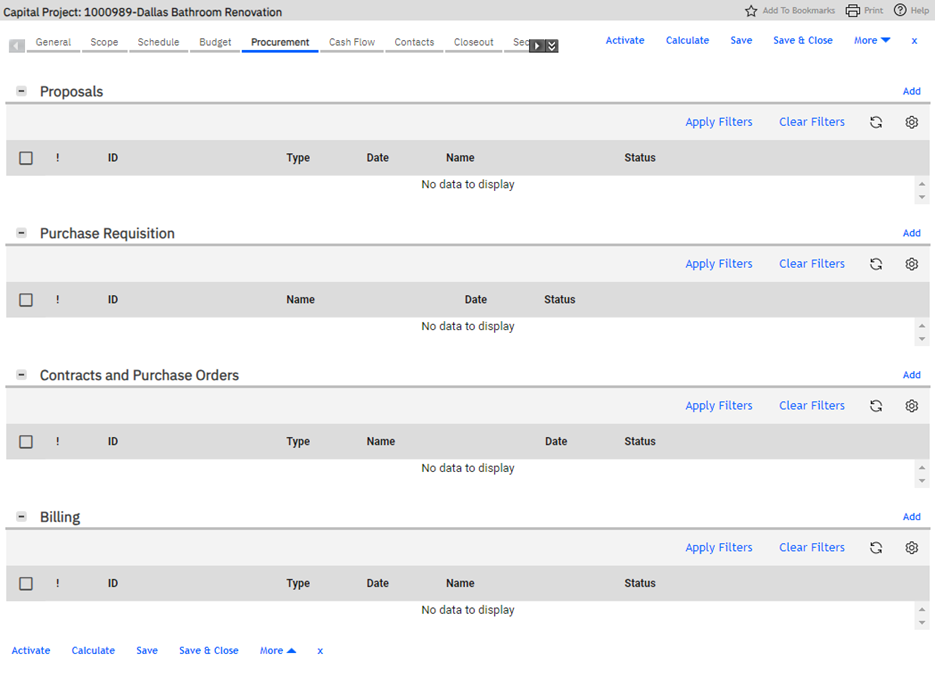
The Procurement tab stores bid and RFQ data, purchase requisitions, purchase orders, standard contracts and change orders, contract invoices, payment releases and PO invoices.
Adding Project Contacts
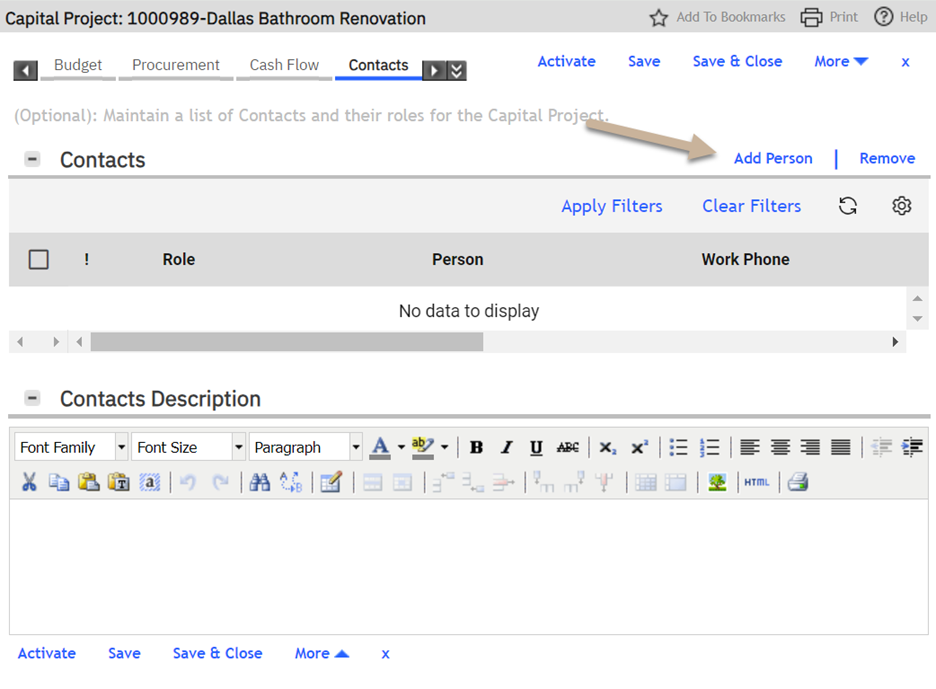
Use the Contacts tab to add the people associated with the project. If set up, contacts can also be used for notifications and approvals.
Click Add Person and select the person you want to add as a contact.
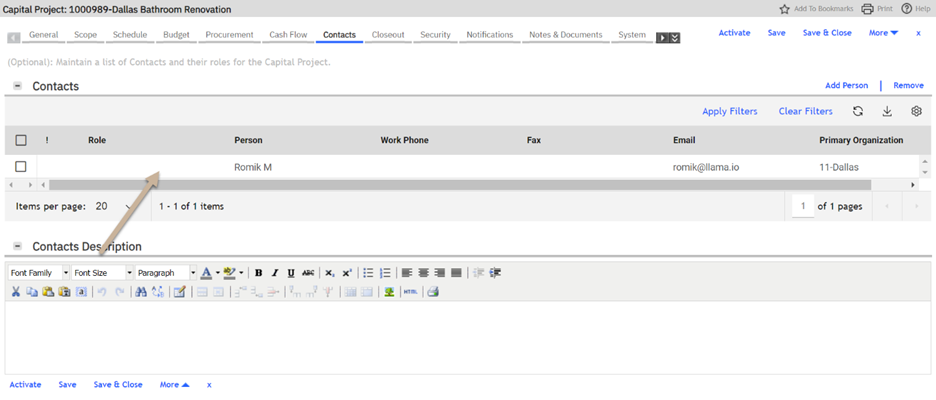
Click the added contact to assign their role.
Click Find.
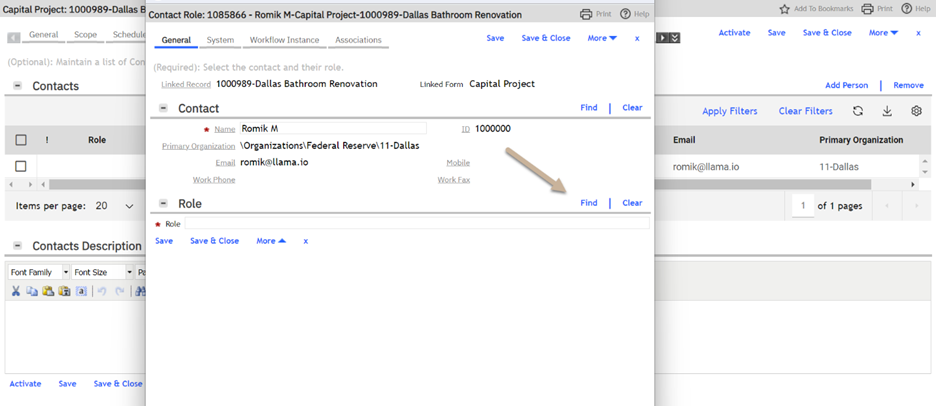
Select All Roles from the query menu, choose Project Manager and click OK.
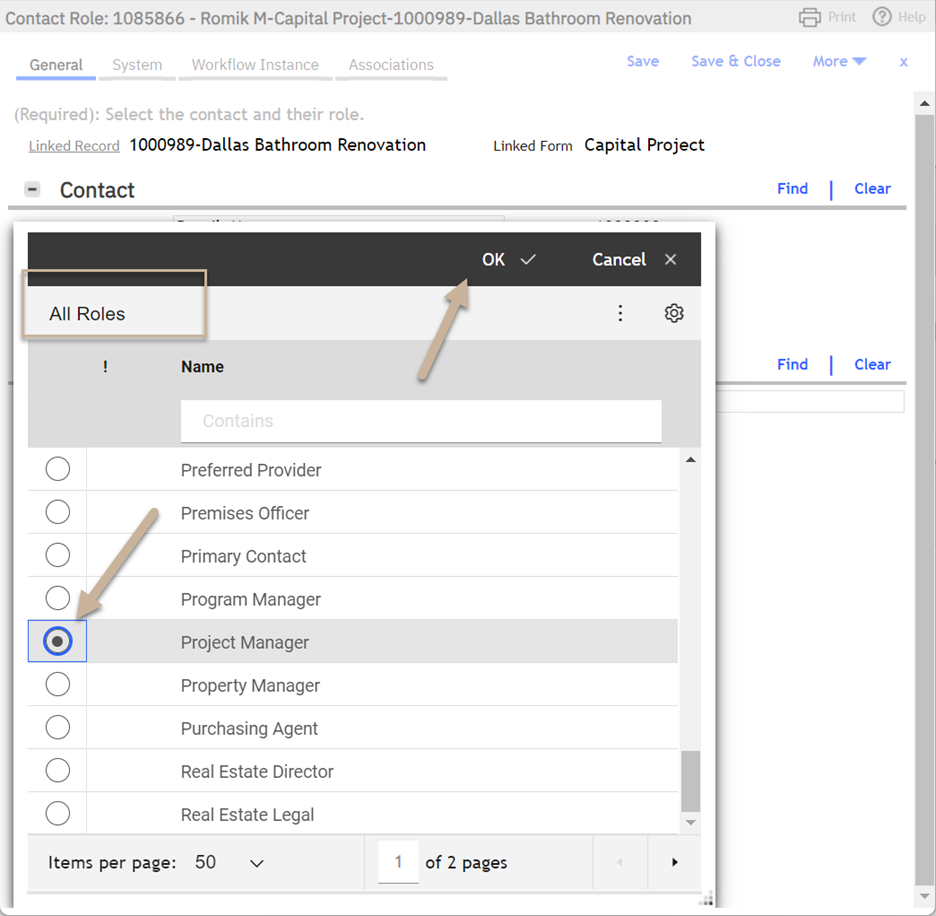
The contact's role updates.
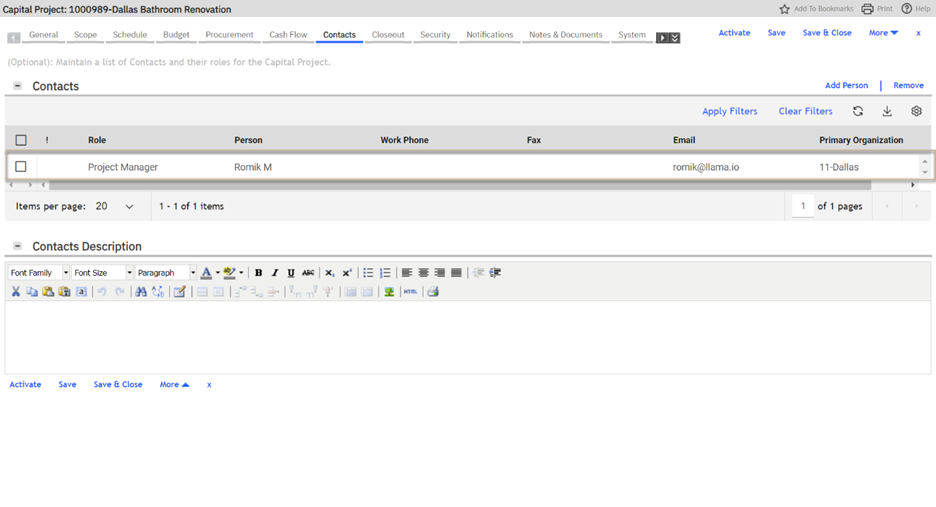
Activating the Project
When the project is ready, click Activate.
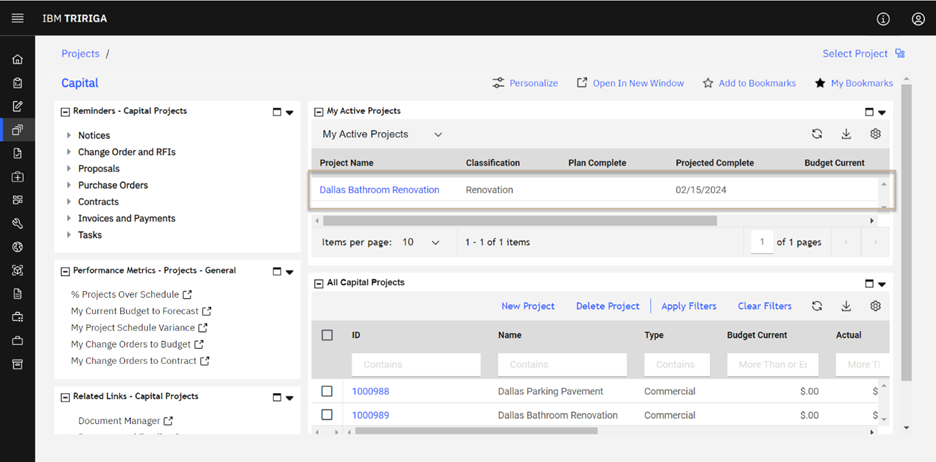
Once Active, the project appears on the Capital home screen under My Active Projects. Its lifecycle officially begins, and changes to schedule, budget, contracts and payments are reflected in the project.
Closing Out the Project
The Project Manager uses the Closeout tab to review the project before it is closed. Confirm that each required step is fully complete; once they all are, the project can be completed.
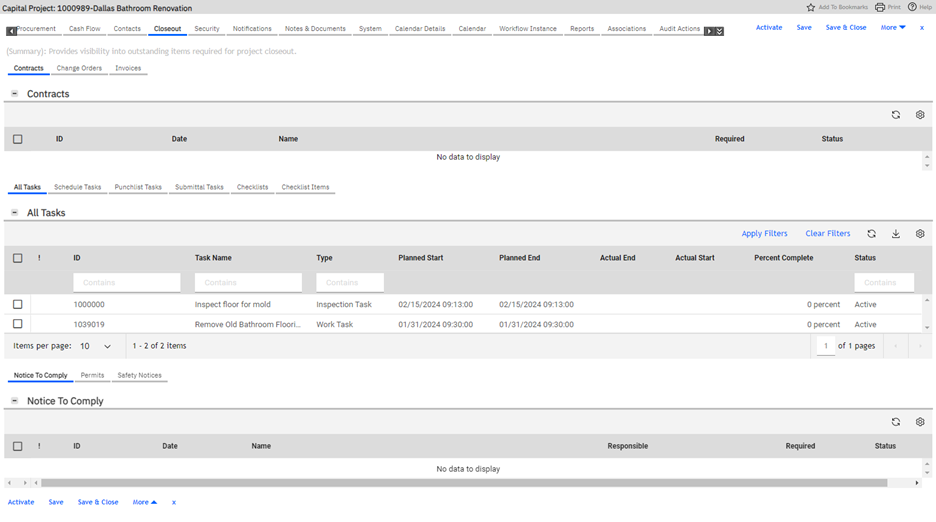
Outcome: Once a project is closed out, its lifecycle is finished and its data is kept for reporting.